Pages

Monday, July 8, 2013

Peanut Butter Cup Cookies

I'm baaaaack! Although I wish I were still on vacation. I came back just in time for MORE RAIN! I had such a great time, though. I even lit off fireworks! With the supervision of experienced people of course. We hiked for about 3 hours, ending at a beautiful waterfall.
We went up a little further to the next watering hole where we could just walk into the water. The water was meh 50 degrees. Let me type that again, 50 DEGREES!! We went into that water up to our necks, some dunked their heads in. Literally takes your breath away for a few seconds. It was SO worth it! The experience of it all was just phenomenal.

I'm back home, but my mind is not. We had so many dessert options! Our appetizers were desserts. Then we would have a meal and finish with, what else, dessert. I don't think there is anything wrong with that! Well, I ate breakfast this morning and cookies crossed my mind. I went straight into deep thought, tapping into my inner sweet tooth to figure out what kind of cookie I wanted. That's it!

Peanut. Butter. Cups. So ladies and gentlemen, without further a due. I give you... 

Peanut Butter Cup Cookies
I made about 21 cookies

1 box yellow cake mix 
*Note: I use Pillsbury cake mix-the pudding in the mix tends to make a softer cookie
1 stick of butter, melted
1 egg
25 Miniature Reeses Peanut Butter Cups, chopped into chunks

Preheat oven to 350 degrees. Mix all ingredients into a large for about 2 minutes. Stir in peanut butter cup chunks. Roll into balls, mine were about 1 1/2 to 2 inch. Drop onto nonstick cookie sheets. Bake for about 10 to 11 minutes. Remove from cookie sheet after 2 minutes.


Yup. There it is folks. It is a nice buttery cookie and then the peanut butter cups are added. I just can't stop eating them. 

Stare into the cookie. Be mesmerized by the cookie. You get the picture. Just try these little sweeties!


Friday, July 5, 2013

Butterfinger Cookies/Whoopie Pies

Today I leave for my weekend camping trip and I am SUPER excited!! I wanted to leave you all with one more recipe before I disappear for the weekend.

I absolutely LOVE butterfingers. And the fact that butterfingers are included in these cookies is definitely a reason for celebration! They have a nice crunch factor to them and the cookies themselves are not overly sweet. They do become very rich when turned into whoopie pies due to the peanut butter filling, but don't let that scare you! I get requests from my sister to make them all the time. Definitely worth giving them a try and very easy to make! I do simplify the recipe by making the frosting with store bought frosting and peanut butter only. Sometimes I add in some vanilla as well. And since I am bringing the cookies to camp(four hours away), I won't have to worry about keeping the frosting cold the whole ride there.
(Click HERE for original recipe!)
Just the cookies.


Butterfinger Cookies/Whoopie Pies
Makes about 20-24 whoopie pies

1 box white cake mix
1 stick butter, melted
1 egg
6 snack sized Butterfingers, chopped

Preheat oven to 350.
Combine all of the ingredients into a large bowl and with a mixer, mix for about 2 minutes. Will be crumbly at first. Just keep mixing! I greased my pan to be on the safe side, but if your pan is non-stick, there should be no worries. Roll dough into about 1 inch balls and place on pan. Bake 9-10 minutes. Let cool on the pan for a couple of minutes and remove to completely cool.

Peanut butter frosting for whoopie pies
1 can of vanilla frosting
1/2 cup peanut butter
1 tsp vanilla, optional
4 snack sized Butterfingers

Mix all of the ingredients together and stuff between 2 cooled cookies.
*This is my frosting version, but if you would like the original version from Inside BruCrew Life click the link.*

Yummy Peanut Buttery-ness!!


Have a good weekend!

Wednesday, July 3, 2013

Peanut Butter Trifle

I am happy to report that the sun finally returned today. YAYYY! With that being said, my oven and stove top is off duty today. And so am I. I have been getting ready for my big weekend away from the city life. My uncle has a camp up North which means no cell phone, no work, and plenty of FUN! Until then, these next few days are going to be pretty chaotic so bear with me!

Whether you are going to a 4th of July celebration or are hosting one, I might have the perfect dessert dish for you! Delicious is an understatement for this dish. I made this for a summer party one year and literally not even a half hour after I served it, it was gone. Talk about success!


Peanut Butter Trifle

Chocolate cake, cooled (I used boxed Devil's Food cake)
1 big box instant vanilla pudding (plus milk for pudding)
About 1/2 cup of peanut butter
(add a 1/4 cup more of peanut butter if you are a peanut butter lover like me!)
10 Reese's peanut butter cups, cut into quarters

Cut the chocolate cake into large chunks. You want to get at least 3 layers out of the cake. Prepare the vanilla pudding and with a whisk, mix peanut butter in with pudding until combined. In a trifle dish, or whatever you have on hand(Make sure the dish is tall), put a layer of chocolate cake into the bottom of the dish. Cover the cake with a big spoonful of peanut butter pudding. Sprinkle a few of the Reese's cups on top of the pudding. Repeat layers a couple more times. Now for the top layer, I crumbled the leftover cake and sprinkled it all over the peanut butter pudding and then topped it with the remaining peanut butter cups. Tadaaa!

Of course I MADE SURE I had at least one leftover peanut butter cup for myself, but this is completely up to you. The chef always tests the ingredients first, especially when making over the top dishes such as this one. I ensure you, sweet lovers everywhere will enjoy this!


Tuesday, July 2, 2013

Tabouli Salad

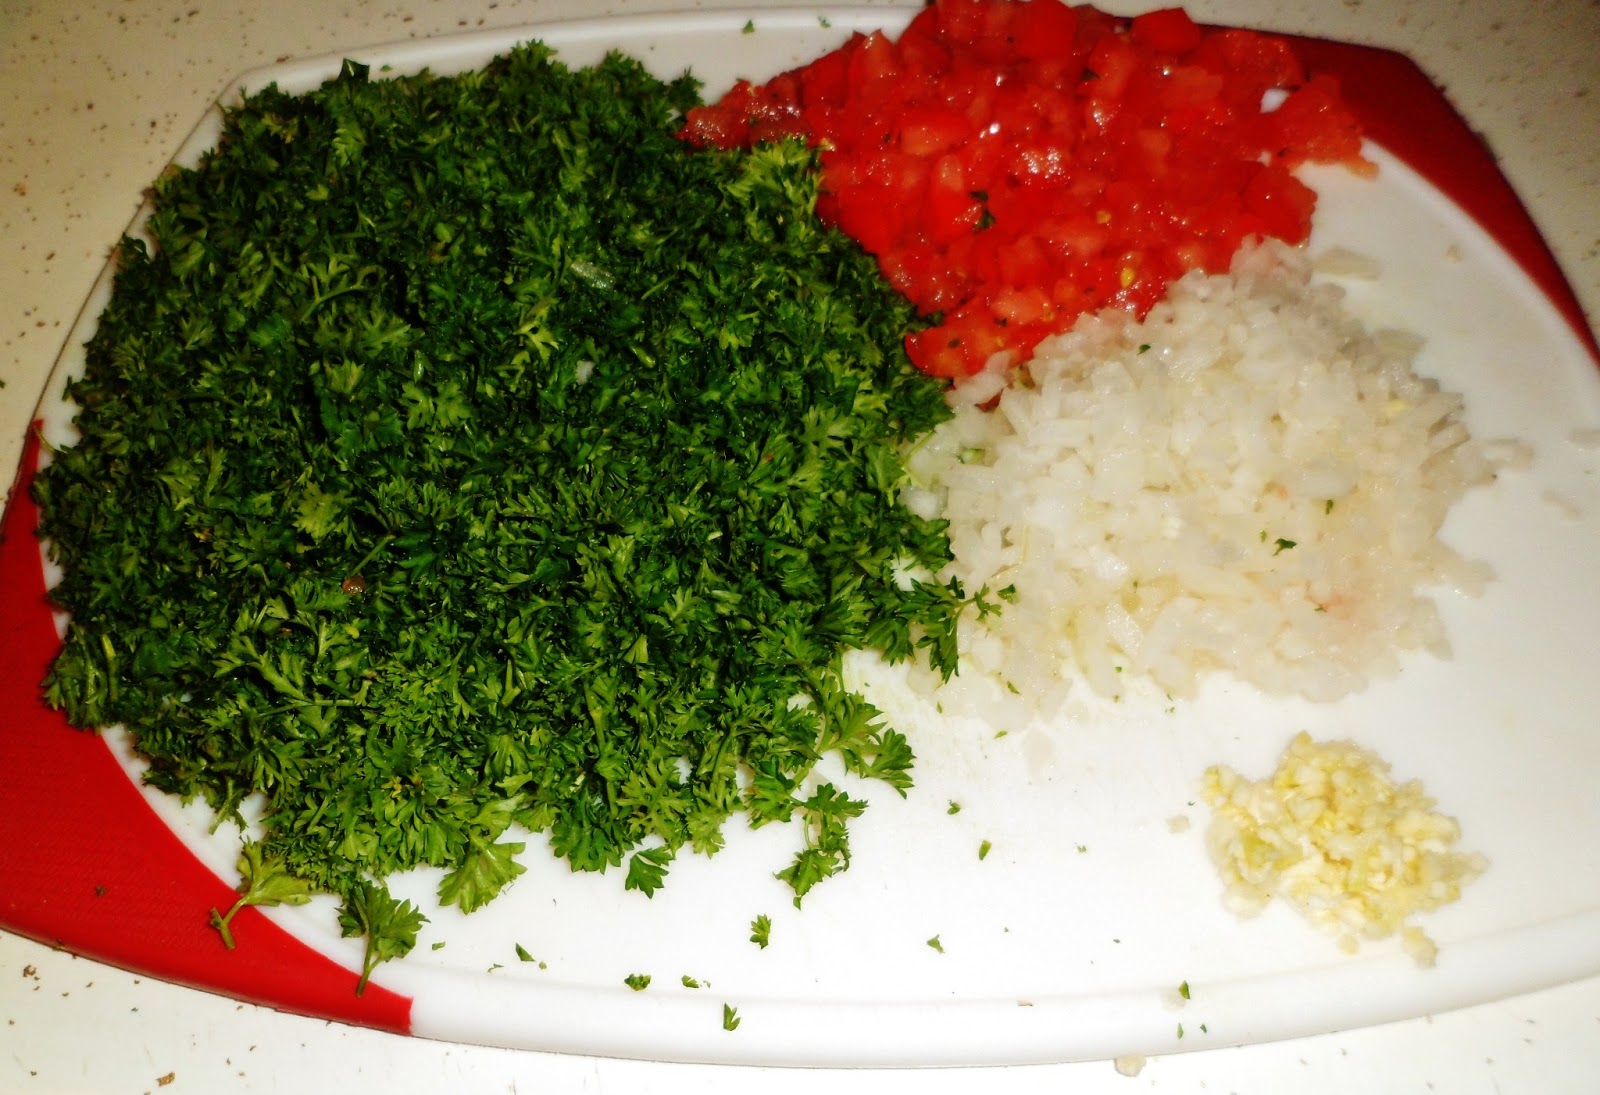
Where are all of my tabouli lovers at?! I fell in love with tabouli salad a few months ago and I can't get enough! It usually consists of parsley, tomatoes, onions, bulgur, garlic and a few seasoning additions. I buy it all of the time, so I figured why not make it?

I did make a few changes to the "classic" recipe, just to experiment a bit. Tabouli typically uses olive oil, which I did without, and I used quinoa because I couldn't find bulgur at my local supermarket. Either one will work! It is very refreshing and pairs well with numerous different food items! I've tried it on pizza, on toast, with chips, with scrambled eggs, in a grilled cheese sandwich...much more too!


Tabouli Salad
Serves 6-8

1 medium tomato, diced
2 bunches(about 2 cups) of parsley, finely chopped
1 cup quinoa
1/2 medium onion, finely chopped
1 clove garlic, minced
1/2 cup mint leaves, finely chopped
lemon juice of 1 lemon
salt&pepper to taste


Prepare quinoa according to package directions. Cool completely. Place chopped veggies in a medium bowl, add cooled quinoa. Squeeze lemon juice over everything cut side up to prevent the seeds from dropping into the salad. Stir everything together and add salt and pepper to your liking. Cover and refrigerate for at least an hour.

And since my boyfriend is not a huge veggie lover like I am, this whole bowl is mine. Is it so wrong to make something purposely because you know your significant other won't eat it?!


Monday, July 1, 2013

Chicken Gnocchi Soup

Now I know rain gives way to beautiful flowers and greenery, but over here on the East coast, it has been raining for about a week and a half now. We have a had a couple of sunny breaks in between, but I think depression is sinking in. This girl thrives on Vitamin D! A few of the days have been especially chilly so soup seemed like a fitting menu item. 

My boyfriend and I went to Olive Garden recently and they have this wonderful soup which we both fell in love with. I've wanted to try gnocchi for quite a while now, and I finally had the opportunity to do so. Little dumplings made of potato, egg, and flour. Yum! They were perfect in this soup! I just had to make this soup. Having it once was NOT enough! And now you can experience it for yourself as well! The preparation takes time, but it is totally worth it!


Chicken and Gnocchi Soup

1 cup chicken breasts, diced and cooked
4 Tbsp butter
4 Tbsp olive oil
1 quart half and half (I used evaporated milk)
1 14 ounce can chicken broth
1/2 cup celery, sliced
1/4 cup flour
2 garlic cloves, minced
1 cup carrots, shredded
1 medium onion, diced
1 cup fresh spinach, coarsely chopped
1/2 tsp dried thyme
salt and pepper to taste
16 ounce package gnocchi

In a large stockpot, saute the onion, celery and garlic in the butter and olive oil(I sprayed the pot with cooking spray instead of using oil). When the onion is transparent, add the flour and form a roux(thickener using butter and flour). Stir and cook a minute. Add the half and half evaporated milk . Meanwhile in another pan, cook the gnocchi. Add the carrots and chicken to the stockpot. Stir often and when it gets thicker, add the chicken broth, gnocchi, spinach and seasonings. Cover and heat through. Serve with crusty bread to dunk in the soup! Enjoy!
Adapted from Pass the Sushi


Saturday, June 29, 2013

Kitties, Cookies, and Cake!

I know what you're thinking, and I too am quite surprised he fit into the bathroom sink!
This is what I woke up to one morning when I walked into the bathroom. He likes to be left alone so he finds these peculiar places to sleep. Silly Kitty!

So, the past couple of days I've had this RAGING sweet tooth! What do I turn to when this happens?! Cookies!! Peanut butter cookies at that! I wanted to make cookies, but I wanted something quick. Of course, 1-2-3 Peanut Butter cookies. I have been making these cookies for years and they are so easy and delicious! They have a chewy consistency and are super rich and only have 3 ingredients!


1-2-3 Peanut Butter Cookies
Makes about 18 cookies

1 cup Peanut butter
1 cup sugar
1 egg

Preheat oven to 350. Mix everything together in a bowl, sometimes I like to add 1 tsp. vanilla as well. It sometimes helps to chill the batter for about a half hour or so, especially when working in a warm environment so the cookies don't spread as much.  Drop onto ungreased cookie sheets, bake 10-12 minutes.
And voila!

If you're like me, you probably can't wait a couple of minutes for them to cool and just stuff them into your mouth like a crazy person and burn the roof of your mouth. Yeah, but so worth it.

And cake. My grandfather is turning 75! Just your basic yellow cake with buttercream frosting, but oh so yummy! Happy Birthday, Grampa!


Friday, June 28, 2013

Oven Fried Pickle Slices

An adorable picture from a friend this morning! Everyone say "awwww!" You know you wanna!
Beautiful Amazing World on Facebook!

So Fried Pickles. They pretty much equal love. So fantastic-ly delicious. If you have not tried these little gems ever, I suggest giving them a try. If you don't like pickles, well I'm not one to judge, but WHY?

Oven Fried Pickle Slices
   Makes 6 servings.

1 jar pickle slices(It is best with slices not spears)
2 eggs
1/3 cup flour
1 Tbsp Worcestershire sauce(I omitted this)
1 tsp hot sauce
1 tsp garlic powder
1 tsp Cajun seasoning
1 tsp pepper
1 1/2 cups panko bread crumbs
Ranch dressing + hot sauce for dipping(Optional)


Put oven broiler on high. In a medium bowl, mix together eggs and flour. Add Worcestershire sauce, hot sauce, garlic powder, Cajun seasoning, and pepper. Mix well. Put panko bread crumbs onto a large plate. Dunk each pickle slice into the egg mixture, then dredge it in the panko bread crumbs. Put coated pickles on a baking sheet sprayed with non-stick cooking spray. Place pan in the middle rack of the oven. Broil for about 3 minutes on each side. They don't take long! Be sure to watch them. Serve with Ranch dressing and a dash of hot sauce.
*Note* Make sure the pickle slices are dried using paper towels before starting the coating process so the coating will stick more easily! I sent the ingredients to make these over to a friend in NY and the pickles weren't dried so she had a bit of trouble. I didn't eat with ranch or additional hot sauce and they tasted just fine!